
Hey Bestie! So the way I dip the bottoms of my cookies in chocolate has blown people’s minds! And that’s exactly why I love sharing my baking and decorating tips with you! I’m all about finding and sharing ways to bake and decorate EASILY! Making beautiful and delicious cookies does not need to be complicated or super time-consuming. But in response to my method, I’ve also received a ton of requests asking for more info. What chocolate do I use? Can you use any chocolate? How do I know the perfect amount? SO today I’m breaking it all down for you to learn exactly how to dip your cookies in chocolate the easy way. Let’s go!
who doesn’t love a chocolate bottom?
Honestly, I really need to thank my husband for inspiring me to create this easy technique. For whatever reason, he loves cookies with chocolate bottoms or backs! Regardless of the kind of cookie I make, he always asked for them to have chocolate bottoms. And if you’ve ever tried simply dipping your cookies in chocolate to achieve this, you know it’s really messy and really difficult to get perfect results.
You can use this technique with ANY kind of cookie. I add chocolate bottoms to my chocolate chip cookies and almost always add this delicious touch to my stamped cookies. Many cookies are already beautiful on the top or front, so I don’t want to take away from that. But adding this delicious flavor combo or even complimentary color to a cookie set adds that something special that sets your cookies apart from all the rest.

What kind of chocolate do I use?
If you didn’t think the dipping technique was easy enough, buckle up! When it comes to dipping cookies, not all chocolate is created equal. The type of chocolate you use makes a huge difference in how smooth, glossy and stable your coating turns out.
I use melting chocolate or wafers to add a perfect layer to the bottoms of my cookies. These are formulated specifically for melting and dipping without any fuss. They melt smoothly, set up quickly and harden with a beautiful sheen. They also hold their shape at room temperature so your coating doesn’t even up streaky or sticky. As long as they are melted correctly, they are essentially foolproof, which is why they are so popular among bakers and decorators. You simply melt these in the microwave and you’re ready to use.
My favorite melting chocolate is from Merckens. They make a wide variety of colors and flavors that melt beautifully and offer a beautiful shine. If flavor and quality is a priority, Merckens is hard to beat.

- 2 pound bag of Merckens Coating Melting Wafers Milk Chocolate Cocoa Lite
But many bakers simple use almond bark which works beautifully as well! This is readily available in milk chocolate and white chocolate flavors at most grocery stores.
Lastly, candy coating or discs that you’ll find at popular craft stores, like Michael’s and Hobby Lobby are a fabulous option as well. Especially when you want to have a colored coating.
Can you simply use melted chocolate chips?
Not if you want the same beautiful finish without taking additional steps. Chocolate chips and chocolate bars are made with cocoa butter, which helps them keep their shape. Notice how when you make chocolate chip cookies, the chips hold their shape even after baking? That’s why.
If you simply melt chocolate chips and use them to dip, the coating will dry soft, streaky and dull. And it will likely bloom (develop those white streaks or spots) within a day or two.
If you want to use chocolate chips to dip, you’ll need to temper it. Tempering is a process of carefully melting, cooling and reheating to align the cocoa butter crystals. When done right, it’s beautiful! But requires precision with time and temperature. Bestie, who’s got time for this?
If you want the easiest, most reliable way to add a dipped coating to your cookies or other baked goods, just use melting chocolate designed for this purpose.
How to use melting chocolate
Using melting chocolate is as simple as putting it in a microwave-safe bowl and slowly melting it. Instructions for melting are typically included on the packaging of these products. But here is how I melt my chocolate.
- Put the discs or blocks in a microwave-safe bowl
- Heat in microwave for 1 minute on HALF power.
- Stir
- Heat in microwave in 30-second intervals on HALF power.
- Stir well after each heating cycle.
- If you see just small lumps of unmelted chocolate, you can almost always just stir until those are completely melted, without needing another heating cycle.
- Most importantly, do not overheat this chocolate. If your chocolate has melted and you keep heating it, it will seize up and return to a solid.
This is the same type of chocolate bakers use to coat cake pops and make cocoa bombs! It’s incredibly versatile and can be used in endless ways super easily.
Can I color melting chocolate?
Yes, you can! But you need to use oil-based coloring with chocolate. If you add water-based coloring, or any water for that matter, to chocolate, it will seize up and become hard again. This is why many bakers prefer to use colored melting chocolate versus coloring their white chocolate.
Oil-based coloring is more expensive than water-based coloring but can be used in buttercream and other decorating mediums as well. The gold standard when it comes to oil-based coloring is THIS company.
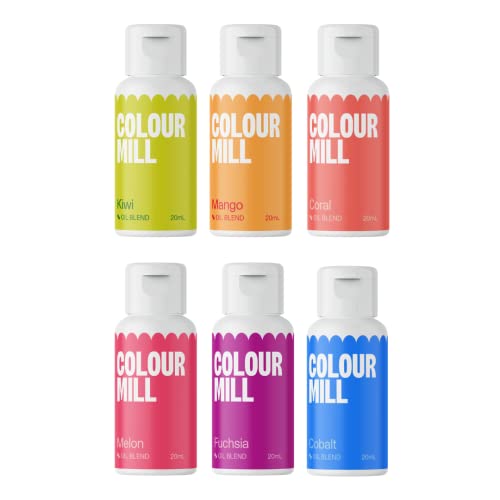
- Color dyed and dispersed with these oils, allowing you to achieve color rich & vibrant
Can I freeze my cookies with chocolate bottoms?
Yes! If you’re using melting chocolate like I do, these cookies can be frozen and thawed beautifully without any changes to your chocolate. Cookies with a coating of melting chocolate can be frozen for weeks or months. Freeze in an airtight container and let that container reach room temp before opening to ensure condensation can’t reach your chocolate, which could leave spots.
Conversely, if you simply melt chocolate chips without tempering the chocolate, freezing will cause the chocolate to bloom, giving the white/gray streaks.
Let’s talk technique
Adding a beautiful chocolate coating to the bottom of your cookies doesn’t have to be a messy process. I simply add a dallop of melted chocolate to a parchment-lined cookie sheet and then push my cookie down on top of it. Apply even pressure until you start to see the chocolate meet the edge of the cookie. By doing one or two, you’ll quickly learn the appropriate size dallop of chocolate to put on the parchment sheet for your sized cookie. I usually use a piping bag for more precision, but simply using a spoon works great too.
Once all your cookies are sitting on their chocolate coating, pop the cookie sheet in the fridge for 10 minutes to set the chocolate. From here, your cookies are done! It’s seriously that simple.
How to dip cookies in chocolate – video demo!
Alright Bestie, we’ve covered all the things! Let’s watch to see exactly how I add a delicious chocolate layer to the bottoms of my cookies, the easy way!

Ready to get your dip on?
I hope this post all about puffy royal icing writing was helpful and that you can achieve the glorious puff you’re longing for! But if you need any more help or want to show off your puff, you can find me and thousands of fellow Besties HERE. It’s the happiest corner of the internet where you’ll find endless help, support, inspiration and celebration of beautiful bakes.
And if you’re not already receiving my weekly newsletter, you are missing out! Many Besties say it’s their favorite email of the week! You can subscribe below so you never miss out on a new recipe, technique, tutorial, product recommendation and all the free printables! Happy Baking, Bestie!
Thank you so much for the dipping cookie idea. Love it! l always make a mess.
Hi Tess! I’m so happy this was helpful! Sometimes we make things harder than they need to be! LOL!
Hi Erika,
Thanks for all of your great information.
I’m wondering where you got the stamp for the pink cookies with chocolate base as shown?
Thank You.
Sincerely,
Sue
You have made chocolate bottoms look so easy. You are brilliant and it’s thanks to you that my cookie dough is now the best I’ve ever made. I think I was creaming the butter and sugar for too long! Who would have thought!
Thank you for sharing your work and ideas. It has been so helpful that me. 🙂 Trish
Hi Trish! I’m so happy I can be helpful! You’re so welcome, that’s what I’m here for, Bestie!! 🥰
Hi
How thick do you roll out your dough? These are beautiful.
Hi! I roll my cookies 1/4″ thick. But you’re welcome to roll to any thickness you like!
Hi! If I make the cookies crispy, how much in advance do you think I can make them? How long do they stay fresh for you?