
Hey Bestie! Tis the season for baking beautiful cookies with a world of different flavoring options. Whether you love the traditional flavors or want to set your cookies apart from the rest, you have no shortage of options. Today I’m sharing two of my favorite cookie stamp designs, the recipes, the technique and tips to create your own this season. Whether you love stamped cookies with jam, chocolate or even royal icing, you can make them all! Let’s get baking!
Cookie Stamp Recipes
Successfully and easily making stamped cookies all starts with the right recipe. After years of subpar results using recipes online and even the ones that came with cookie stamps, I created my own collection years ago. These recipes are easy to make, don’t require any chilling and perfectly capture the intricate designs you want. Bakers contact me year-round looking for help with their stamped cookies after not being able to achieve the results and flavor they want. The recipe and technique you use makes ALL the difference in the world. After bakers try my recipes and technique guidance, they can’t believe the difference and how simple they are to make!
In today’s demonstration, I’m using my Butter Vanilla cookie stamp recipe which you’ll find below. I love this recipe because it can be beautifully paired with any kind of filling or coating. The Butter Vanilla Emulsion takes these cookies to the next level, leaving those you bake for asking for the recipe. No one can ever believe these are homemade since they look so professional. Enjoy the praise…they don’t need to know how simple they were to make.
But in Bestie-land, I always give you options. Want a chocolate cookie? Peanut butter? Lemon? Red velvet? Gingerbread? Bestie, you can make stunning stamped cookies in all of these flavors and many more. You’ll find all these different flavor options linked HERE.
Cookie stamps for filled centers
Today we’re focusing on stamped designs that include a reservoir to add jam, chocolate or any filling you’d like. I use and love both of these designs when I want a cookie with a filling. I’ll leave it up to you to decide which design you love best.


The design on the left is made with THIS cookie stamp. And the design on the right uses THIS cookie stamp. Both create beautiful cookies and an easy way to add a filling. Helpful tip: If you ever can’t find those specific designs in their Amazon shop, you can always find all their designs in their Etsy shop HERE. The small, family-based business that designs and creates these is amazing and I love being able to support a true small business. You won’t find these quality stamps mass-produced and they have so many stunning designs!
wooden cookie stamp technique
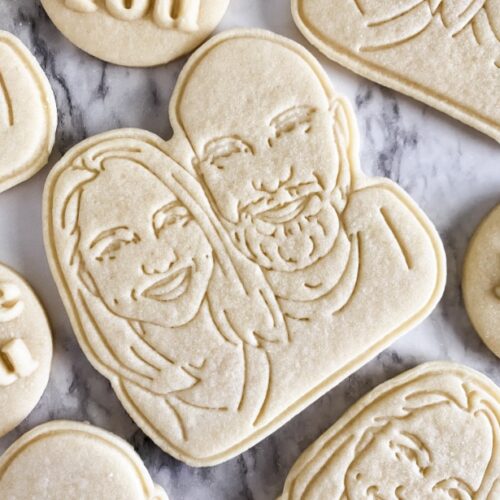
When I’m using any of their wooden stamps, I roll out my dough, just like if I were making cutout cookies. And then simply dip my stamp in loose flour after every 1-2 cookies, and stamp down into my dough. You don’t need to press very hard to get a beautiful impression. From there, I use a round cookie cutter to cut my dough and then bake on top of my favorite perforated baking mats. These magical mats eliminate any change of cookie spread and leave pretty pattern on the bottom of my cookies. Pro tip: Before stamping your first cookie, run your stamp under water and towel dry off so the flour has some moisture to stick to.
Using this technique, dough should beautifully capture your stamp designs without any dough sticking in the stamp. If you do ever experience any dough sticking in your stamp, either your dough is too sticky, or your stamp isn’t floured enough. It’s one or the other. If you think your dough is too sticky, knead a little flour into it and roll out. And when flouring your stamp, make sure you dip into a bowl of loose flour, so the intricately engraved parts of your stamp get floured.
Cookie Fillings
Jam
Are you team jam? In my experience, people either love or hate jam in/on their cookies. But let’s pretend we’re all on team jam for now. When I want my stamped cookies with jam, I bake them for 5 minutes, then pull from the oven, pipe the jam onto the centers and then finish baking my cookies. This keeps the jam from burning or getting rubbery while keeping the color and consistency just how I want it. And I personally use seedless jams for my cookies.
chocolate
When I want to add chocolate to my cookies, I use melting chocolate, like Ghirardelli or Merckens. No tempering needed, just melt and add to your cookies with a spoon or a piping bag. Chocolate sets in a matter of minutes and cookies can be stacked or frozen without any changes. Many bakers use almond bark the same way. You can also use any kind of chocolate you’d like, but chocolate chips or bars will need to be tempered for applications like this.
Icings
You’re welcome to pipe royal icing or even buttercream onto your cookies too! It really just depends on the flavor and look that you want. When I use royal icing for these, I use a thicker icing consistency so that the icing doesn’t crater but still settles smooth.
Cookie Stamp recipe
Here’s the recipe you’ve been waiting for! And below this, you’ll find a demo video showing exactly how I make these cookies, both with jam and chocolate centers.
The Best Vanilla Cookie Stamp Recipe
Ingredients
- 1 cup (227g) Unsalted Butter Chilled, cubed
- 1 cup (200g) Granulated Sugar
- 1 tsp (4g) Vanilla Extract
- 1/2 tsp (2g) Butter Vanilla Baking Emulsion LorAnn brand
- 1 Large Egg
- 1 tsp (5g) Baking Powder
- 1/2 tsp (3g) Salt
- 3.5 cups (470g) All-Purpose Flour
Instructions
- Preheat oven to 350 degrees F.
- We bake on our favorite perforated baking mats to eliminate any chance of spread, for even baking and pretty undersides of our cookies!
- Cream butter and sugar until smooth, about 2 minutes. No need to excessively cream as it can lead to cookie spread.
- Beat in butter vanilla baking emulsion, vanilla and egg, until combined.
- In a separate bowl, combine flour, baking powder and salt. Add to wet ingredient mixing bowl a little at a time.
- Mix until thoroughly blended. Dough should be pulling away from the bowl.
- Chilling the dough is not necessary! I have tried many different ways of rolling out dough and always come back to the old-fashioned way; a sheet of wax paper that has been floured.
- I usually divide the dough into 3 chunks and roll out each onto a floured surface and cut. In my experience, this dough works best for cookies at 1/4" thick. I use my Joseph Joseph rolling pin which does the measuring for me – genius! If you prefer thicker cookies, you'll just want to adjust your baking time.
- I dip my stamp in loose flour and tap off the excess. I re-flour my stamp after every 1-2 cookies.
- Use the cookie stamp to gently press down into the dough to create the design.
- You can use a cookie cutter before or after stamping (depending on style) to cut your dough.
- Bake at 350 degrees for 7-8 minutes. Once the shiny spot in the middle of the cookie is gone, your cookies are ready.
- Let cookies set on cookie sheet until firm enough to transfer to cooling rack.
Notes
Cookie Baking Video Demo!
I made this quick video to show exactly how I make my stamped cookies with jam and chocolate. I hope you enjoy it! You can find the video HERE or by clicking on the cookie image below.

Ready to get stamping this season?
I hope this recipe and tutorial has been helpful for you to learn how to make beautifully stamped cookies with jam or any other filling! It is seriously so simple and yet no one will believe you made them yourself, from home! It’s so fun to make fun flavors and so many beautiful stamp designs. And since these stamps are such great quality, I look forward to using them for decades to come! Designer cookies don’t have to be difficult or take forever! And I hope this makes it easy for you!
If this was helpful, I hope you’re already subscribed to receive my weekly newsletter! And if you’re not, what are you wait for?! Never miss out on a new recipe, technique, tutorial, product recommendation, sale alert and free printables too! Happy Baking, Bestie!
I vote for chocolate, all the time.
These were so pretty. Instead of melting the chocolate for the center I just put a Merck’s disc of chocolate on them straight out of the oven. Saved me a lot of time and mess 😊