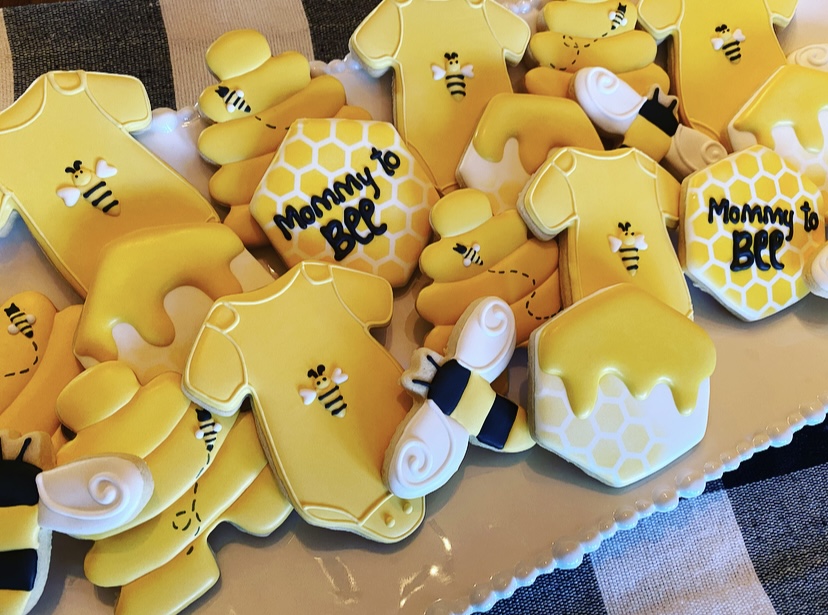
Hey Besties! One of the hottest trends is Mommy to Bee baby shower cookies! How this trend got started, I have no idea. But they are super fun to make with many different design options! Today I’m sharing some photos and tips from a recent set we made! We used our favorite go-to vanilla sugar cookie recipe and royal icing recipe, you can find on THIS page!
Bee Baby Shower Cutters
We created 5 designs to complete this set but used a hexagon cutter for 2 of them. We used THIS 3-piece cutter set from Hobby Lobby along with a onesie cutter from THIS set. Honestly, we use cutters from this baby shower set over and over again, I love it. I also recognize that not everyone has access to Hobby Lobby (hello Canadian besties!), so HERE is another great bee-themed set.
As far as icing colors, we used ChefMaster Lemon Yellow (just a tiny bit) to make a lighter yellow. We also used AmericColor Gold for the slighter darker, gold color. ChefMaster Black Diamond for the font and of course, white. This theme uses a small color palette, which is another reason to love it!
Cookie Designs
Our 5 fun designs included a beehive, onesie, bee, hexagon with dripping ‘honey’ and hexagon airbrushed with “Mommy to Bee” font. These are all straightforward designs which really only require flooding in sections, outlining and adding small details. You can see all the designs here.
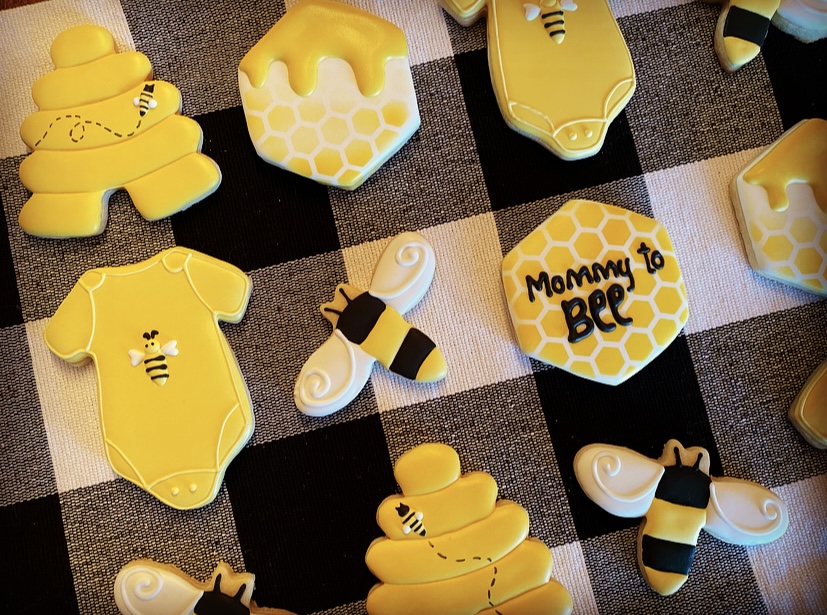

Let’s break down the steps for each design (I know that’s what I wanted someone to do when I started!).
Beehive: Flood sections 1, 3 and 5, and let the sections crust over. Then flood sections 2 and 4. We used our dehydrator to speed up the process, but then let the cookies dry completely overnight before further details. The next day, we used black edible marker to create the bee’s path. We then used thick consistency royal icing in yellow and white to make the tiny bee. Details were added using the same edible marker.
Onesie: Flood the entire cookie, and then outline once crusted over. We then used the same thick yellow and white icing to make the bee, letting each part crust before adding. Lastly, we used thick black icing to add stripes and marker to add antennae and eyes!
Bee: Flooded the wings white and add wing detail once crusted over. Then we simply flooded the black sections and antennae, let those crust over and added the yellow sections. Very simple!
Hexagon with honey: Flooded cookie with white and let completely dry overnight. The next day, we used our airbrush and THIS stencil to airbrush approximately half of the cookie with a soft technique. Once the airbrush was dry, we flooded on the ‘honey’ and let dry in the dehydrator. I LOVED how these turned out!
Hexagon with font: Similar to the previous design, we flooded white and let completely dry overnight. The next day, we airbrushed the entire cookie with the honeycomb design and a slightly heavier hand to make a solid honeycomb pattern. Once dry, we used black icing in a writing consistency, using our projector to write “Mommy to Bee”. We used the font call “Hug Me Tight” from Dafont.com to project and pipe on the words.
Summary
Before I started doing cookies, I had no idea how designs were actually made, what sequence of steps were required along with the tools needed! I hope this breakdown of the designs we created for Mommy to Bee baby shower cookies was helpful! Once you have the tools, there are truly endless design options!
Make sure you are subscribed to the weekly newsletter, so you never miss a new design, technique, recipe, Featured Baker or product recommendation! Happy Baking, Besties!