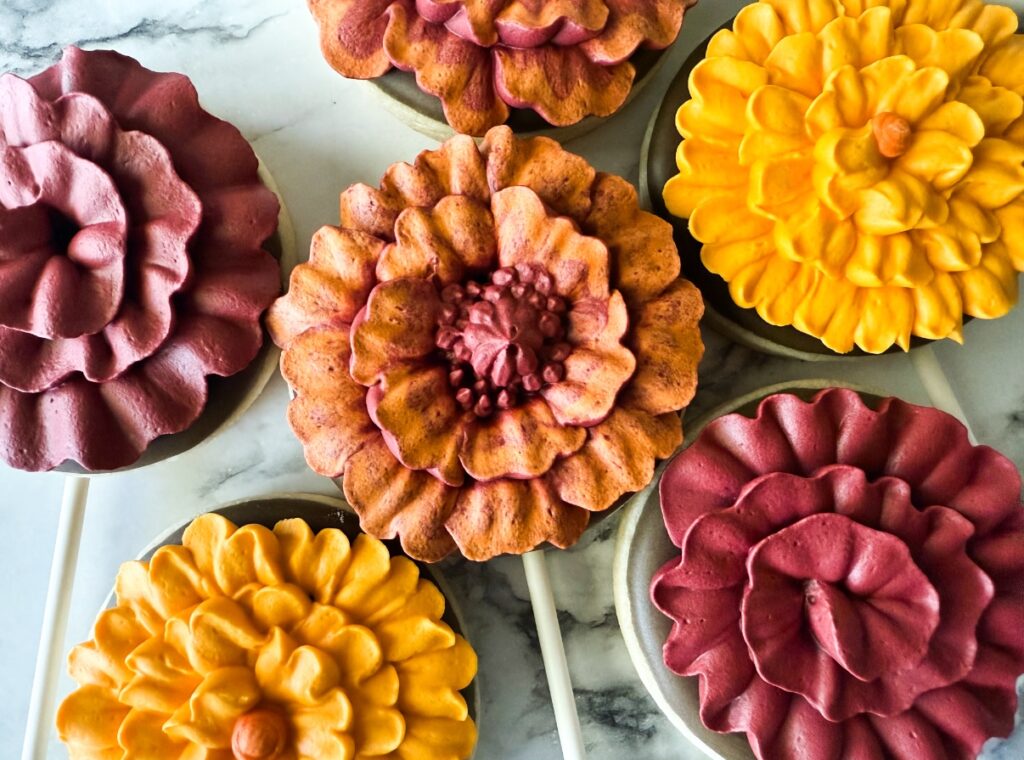
Hey Bestie! It’s been so fun to see all your success in making stunning royal icing flowers! I’m thrilled that all of my flower tutorials have helped take the fear out of florals. That is always the goal, and you consistently tell me they are easier than you had thought! Right?! Flowers are actually super quick and forgiving but look amazing and hard to make. That’s always our sweet spot…creating things that look much harder than they are. But I’ve heard your requests for more flowers, so here we are! Today, I’m showing you how to make three more types of flowers using just petal tips. I LOVE just using petal tips and it makes decorating so much more efficient. Let’s jump in!
Royal icing recipe
You may already have a royal icing recipe you love! But if you’re looking for a fabulous recipe or if your current recipe is giving you any grief, you can find how I make my icing HERE. This is the recipe I use for all of my royal icing decorating, and I get stunning results without any of the headaches that commonly plague cookiers. Bestie, it’s ALL about HOW you make the icing.
It’s worth mentioning that this recipe uses a higher-than-average amount of water. And while that can scare some cookiers because it’s simply different than what they are used to, there are some real advantages. Especially when it comes to florals. See, this water content, paired with how the icing is made, makes for easy piping at even the STIFFEST consistencies. Seriously, no hand cramps here. I cringe when I see cookiers taking about how much their hand hurts from piping florals. That’s completely unnecessary and just putting added stress on your body. Not to mention it’s not nearly as fun to decorate if it hurts. Many cookiers who create a lot of florals love THIS recipe for that reason. Give it a try, you’ll be shocked at the difference.
royal icing consistency for flowers
For making royal icing flowers, you will need STIFF icing to perfectly capture your petals and delicate details. If your icing is not stiff enough, your petals will kind of pool and meld back together. I make my royal icing as normal, then separate into smaller bowls for each color I want. You always want to color your icing and THEN thin or thicken to your desired consistencies. If you did it the other way around, the water in the coloring could thin your icing more. So always color and then achieve the consistency you want. Then I add powdered sugar a tablespoon at a time and hand mix to create the STIFF consistency we need. When the peaks in your icing don’t move anymore, you’re good! Bestie, just when you think it’s stiff enough, toss in a little extra powdered sugar to be sure.
Once you start piping your flowers, you’ll be able to tell very quickly if you have the best consistency. If your petals or details are pooling together at all, stop and go add more powdered sugar for a stiffer consistency. It’s not worth fighting your icing if it’s not the right consistency. You’re much better off correcting it and getting the results you want. Trust me, it’s SO annoying to have to rebag after that first flower because it’s not stiff enough.
This video shows exactly how I make my royal icing consistency for florals.
Petal tip flowers 101
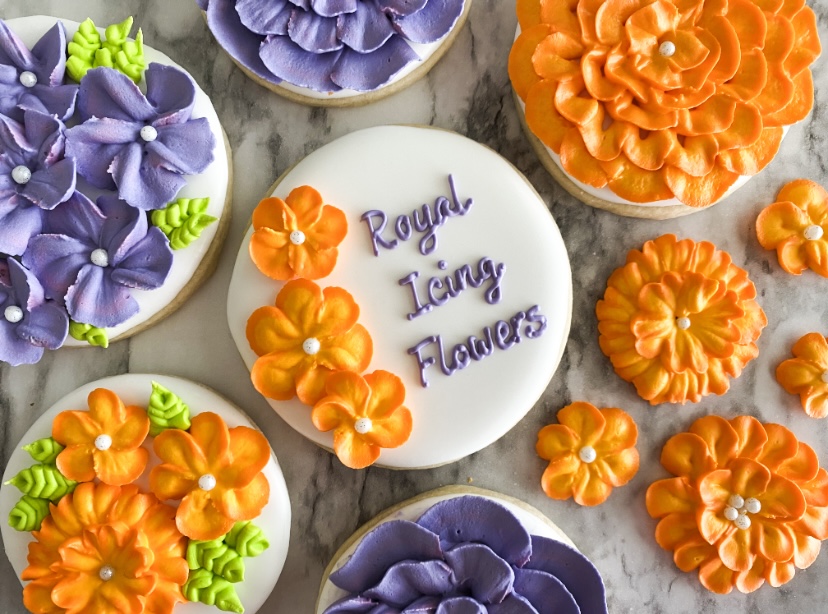
For today’s flowers, we’re focusing on just using petals tips, 101-104. depends on the petal size you want. These are very common decorating tips that every cookier should have in their collection. The designs are endless with just these tips! I’ve been using THIS decorating tip set for years and it’s as good as new.
Now I published THIS flower tutorial last year which is super popular in the cookier community. But a lot of the flower designs we made there we made on flower nails instead of directly on the cookie. I LOVE making florals using flower nails, but many of you like to pipe directly onto the cookie! So today, we’re only piping directly onto the cookie, just for you. But if you want to learn even more petal flower types, you’ll find that tutorial with video HERE.
helpful tips for royal icing flowers
- With ALL royal icing florals, you’ll find that the tiniest angle change in your decorating tip can really give you a whole new look. You’ll find that in today’s tutorial, it’s just simple tweaks in motions or angles that create a completely different look.
- If you’re not using a flower nail, you’ll definitely want a cookie turntable. Some designs can be made by simply holding the cookie, but most have much better success using a turntable, as you’ll see in the video.
- Have a moist paintbrush (reserved for decorating) nearby when making florals. This works perfectly to clean up any tails or petals, much better than a scribe will. A scribe will commonly pierce stiff icing, whereas a moist brush will allow you to smooth, shape and work your petals beautifully.
- When first starting with florals, sit down with a bag of icing, a whole bunch of parchment squares and just practice. You’ll be amazed at the progress you can make in 1 hour, or even 30 minutes, of just practicing.
- Remember, that even in nature, not every flower is perfect and symmetrical! In fact, your flowers will look more life-like if they aren’t perfect! I know many of you are perfectionists, but with flowers, you want them to look natural and not machine-made.
Video Tutorial for petal tip flowers
Okay, let the fun really begin, right?! You can find the quick video tutorial for these flowers HERE, or by clicking the floral image below. I’m using cookie pops today just for funsies! I hope you’ll see that these are simple motions and designs that anyone can learn to create stunning petal tip flowers.
Are you inspired?
I hope so, Bestie! I’ve heard from so many of you that you’ve finally conquered your fear of florals and I’m overjoyed. Keep playing, keep experimenting, or if you have started, what are you waiting for?!
And if this was helpful, make sure you’ve subscribed to receive my weekly newsletter, so you never miss out on new recipes, tutorials, tips, techniques, product recommendations and free printables! Happy Baking, Bestie!